Explore clever design tactics to maximize the functionality and style of your small L-shaped kitchen.
Transforming a tiny L-shaped kitchen into a stylish and functional space is no small task, but with the right design ideas, it’s absolutely possible.
This article will guide you through innovative solutions that maximize storage, improve workflow, and enhance the aesthetic appeal of your kitchen.
From clever cabinet arrangements to space-saving appliances and color tricks that give the illusion of space, we’ve got all the details covered.
So, let’s dive into these ideas and unlock the potential of your small L-shaped kitchen.
Install Multifunctional Appliances

Maximizing the kitchen’s functionality is crucial when working with an L-shaped layout in a small area. Here, the key lies in selecting appliances that can multitask. For example, opting for a fridge with built-in water filtration saves the need for a separate purifier, a dishwasher equipped with a pot scrubber and steam function eliminates manual scrubbing and steam cooking, and a convection oven or a microwave with a grilling feature negates the use for multiple kitchen gadgets.
- Compact oven with microwave function
- Washer dryer combinations
- Fridge with water filters
- Kitchen scale with timer and temperature sensor features
- A convection microwave
- Dishwasher with built-in pot scrubber and steamer
These appliance selections not only save space but also time and effort, making small L-shaped kitchens both efficient and user-friendly.
Use Wall-mounted Storage and Shelving

Wall-mounted solutions maximize the use of vertical space, creating ample room for storage without cluttering the kitchen area. Implementing these strategies, however, requires careful planning and thoughtful design:
- Consider the weight and size of items that would be stored. Heavier items require sturdier shelves affixed to wall studs.
- Utilize different shelving materials – wood for a rustic look, metal for modern designs, or glass to maintain an airy feel.
- Install adjustable shelves for flexibility in accommodating different items.
- Place frequently used items on lower shelves for ease of access.
- Use shelf dividers for improved organization.
- Smaller kitchen aids and tools can be hung underneath shelves to further utilize space.
- Adding lights under shelves bring attention to displayed items and provide functionality.
Prioritize a Practical Layout

Crucial to enduring kitchen functionality is the legendary “kitchen work triangle” – the optimal positioning between stove, refrigerator, and sink. Ensuring easy access to these core areas helps eliminate unnecessary steps and facilitates the smooth flow of activities within the kitchen.
Subsequently, consider the placement of frequently used items around these zones for efficient task execution. Lastly, keep pathways clear – a minimum of 36 inches wide is recommended to avoid clashing during rush hours in the kitchen. Consider slimline appliances or a petite island if space permits. Remember, a layout that complements your routine eases meal preparation and tidying tasks.
Incorporate Light Colors to Enlarge the Space
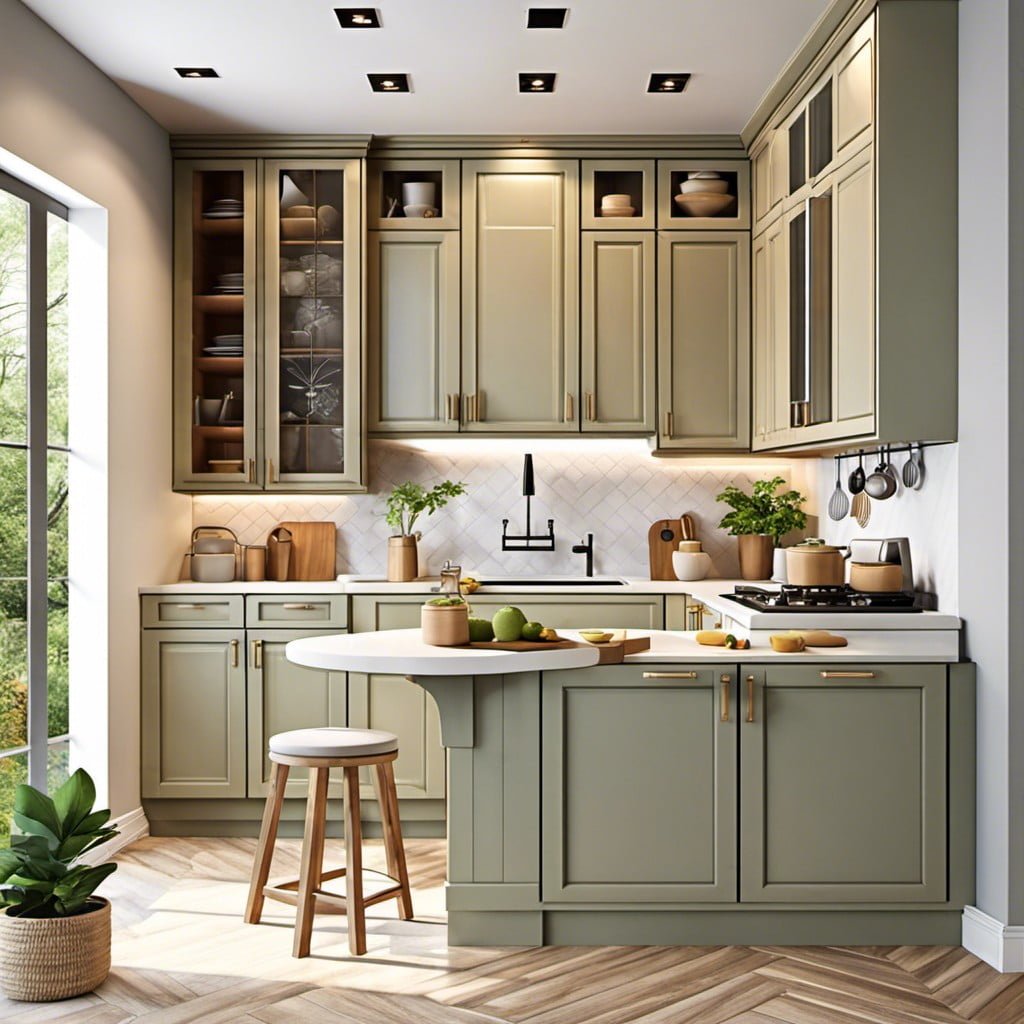
When designing a small L-shaped kitchen, choosing the right palette can have a significant impact. A light color scheme can create an illusion of a larger space, making your kitchen feel more open and airy.
Here are some key points:
- Use shades of white: This can help reflect light and make your kitchen appear brighter and more extensive.
- Opt for high-gloss finishes: High-gloss surfaces also reflect light; hence cabinets and countertops in these finishes can enhance the kitchen space.
- Introduce pastel hues: If an all-white scheme isn’t for you, soft pastels like light blue, or mint green can also open up your space.
- Use monochromatic color scheme: Keeping to one color family can create a visual continuity, therefore, helping the room appear larger.
Avoid using dark or bold colors as they can make the space appear smaller. Instead, if you desire lively spots, integrate bright colored accessories or plants for that pop of color without overwhelming the space.
Use Mirrored and Glossy Surfaces to Reflect Light

Experiment with mirrors or mirrored backsplashes that can send light bouncing around, giving the illusion of more space. The same effect can be achieved with glossy finish on countertops, kitchen cabinets, and even floors.
Key Points:
- Mirrors can magnify both natural and artificial light.
- A glossy finish on surfaces effectively reflects light.
- Reflective surfaces can give the illusion of space.
- Implementation can be done through backsplashes, countertops, or cabinets.
Put in Vertical Storage On Unused Walls

To maximize every square inch of your kitchen, think vertically. Spot the blank spaces on your walls that could serve as potential storage points. There are several ways to utilize these areas effectively:
- Install wall hooks to hang cookware, utensils or even herb planters.
- Use stacked floating shelves to store frequently-used items such as plates, glasses, and mugs.
- Corner shelving units can prove quite practical, making good use of uncommonly occupied spaces.
- Magnetic or pegboard panels offer customizable storage for knives and other tools.
- Racks for wine or spice storage can be easily mounted to the wall.
Remember, whatever solution you choose will not only provide much needed storage but also add dimension to your kitchen. Choose styles that complement your existing decor for a harmonious design.
Try an Open Shelving Concept

Open shelving makes items easily accessible and creates a sense of spaciousness, perfect for small L-shaped kitchens. It provides visual interest and promotes a feeling of openness that cabinets or closed storage can’t achieve. It’s essential to keep the following in mind:
- Keep only frequently used items on display to avoid clutter; less is more.
- Utilize the vertical space wisely; shelves at different heights can add visual interest.
- Incorporate uniform containers for a consistent and organized look.
- Paint shelves in light colors to create an illusion of a larger space.
- Regular cleaning necessary to prevent dust buildup on dishes and utensils.
Select Compact and Portable Furniture

Careful selection of furniture impacts more than just aesthetics. Compact and portable pieces deliver functionality without clutter. Here are some strategic ideas to consider:
- Opt for retractable tables: They offer work and dining surfaces as needed, and can be easily folded away after use.
- Consider nesting stools or chairs: They can be pulled out when needed then stored compactly.
- Go for movable kitchen islands: These pieces are big on functionality, serving as storage, prep area, and dining surface.
- Choose built-in seating: This option, such as banquette seating that fits snugly in a corner, offers both seating and extra storage.
- Use furniture with multiple functionality: For instance, a butcher block can function as a chopping board, storage unit, and also a serving cart.
- Consider wall-mounted folding tables or desks: They can be used as working surfaces and folded back up when not in use.
In a small L-shaped kitchen, every inch counts. Portable and compact furniture can help maximize the usability of the space while maintaining an open feel.
Design Countertops With Storage Underneath

Identifying hidden storage spaces are crucial in a small kitchen; a countertop with an underneath storage can serve multiple purposes.
Here are a few key points:
- 1. Keep frequently used kitchen items such as pots, pans, and utensils in easy-to-reach drawer slots under the countertop.
- 2. Use pull-out bins or trays for effective organization and easy access.
- 3. Investing in custom-built storage systems can be optimized for specific uses, such as a separate section for cutlery or plates.
- 4. Consider sliding doors or a hinged panel to conceal stored items and maintain a sleek look.
- 5. Spare no space, even the corners can accommodate rotary pull-out systems, making sure every inch is fully utilized.
By optimizing countertop storage, both an aesthetically appealing and highly functional kitchen is achieved.
Use Magnetic Strips to Store Utensils

Magnetic strips prove incredibly useful in terms of ensuring your kitchen utensils are always within arm’s reach yet safely stashed away. Here are a few considerations to keep in mind:
1. Positioning: Ideally, place your magnetic strip near the stove or your main chopping area for easy access.
2. Materials: Not all utensils are magnet-friendly. Ensure your utensils are made of magnetic metals such as stainless steel or iron.
3. Safety: Be wary of utensils with sharp edges. Make sure they are secured well on the strip.
4. Spacing: Give enough space between utensils to avoid them sticking together.
5. Length: The strip needs to be long enough to hold all your utensils without crowding.
6. Strength: The magnetic strip must be strong enough to hold heavier utensils.
7. Cleaning: Magnets do not hamper cleaning. You can easily wipe them with a damp cloth.
8. Aesthetics: Align with the overall kitchen theme. Choose a strip that complements your kitchen decor.
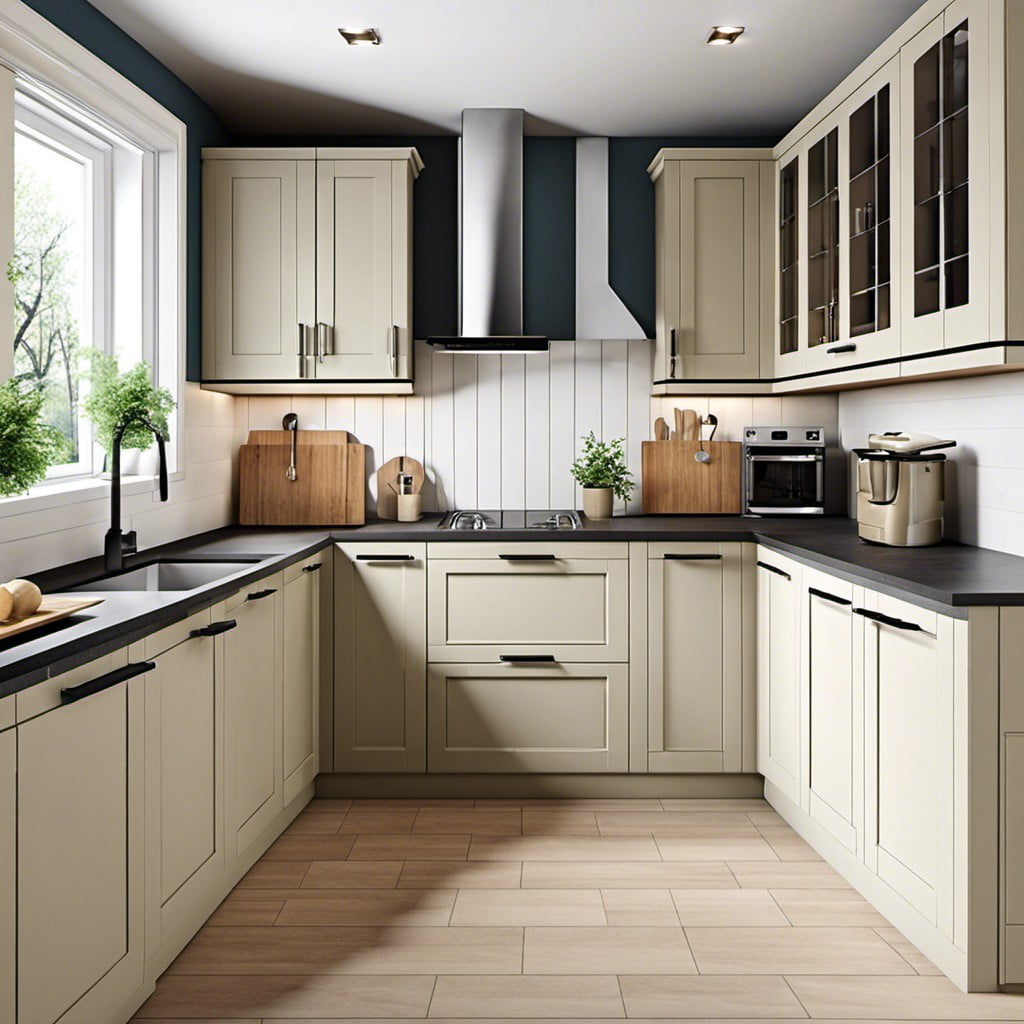
Install an Efficient Range Hood

An efficient range hood is vital for small L-shaped kitchens, aiding in proper ventilation and removal of smoke, as well as improving the air quality. It prevents grease buildup on walls and ceiling, hence requiring less frequent deep-cleaning of the kitchen area.
A factor to consider when selecting a range hood is noise level along with its efficiency – a quiet, yet powerful model would be the best choice. You might want to install it directly above the stove for maximum efficiency.
Key Points:
- Helps maintain clean air in the kitchen
- Prevents grease buildup
- Should be installed above the stove
- Consider noise-level along with efficiency
Go for a Single-bowl Sink

Opt for a single-bowl design, especially when working with a tight space. This configuration allows for more counter area and provides just enough room to wash dishes without sacrificing too much space.
Key points:
- It’s easier to clean larger items in a single-bowl sink such as pots and pans.
- Provides more counter space.
- Can often be integrated seamlessly into the rest of the kitchen design.
- Keep in mind the configuration of existing plumbing when choosing the location.
- Single-bowl sinks still offer a variety of shapes and depths to best suit your needs.
Use Folding Tables As Extra Counters

Implementing a foldable table offers the flexibility of extra counter space whenever required, and when not in use, it can be easily tucked away to maintain the spaciousness of the kitchen.
1. Saving Space: When folded, these tables utilize little room, an important advantage in smaller kitchens.
2. Versatility: They serve multiple purposes – counter during cooking, a dining table while eating, and a workstation while doing office tasks.
3. Design Consistency: These tables are available in various designs and materials to match the kitchen’s aesthetic.
4. Easy Installation: They can be installed on walls or as part of the cabinetry, offering easy accessibility and maintenance.
5. Cost-Effective: Opting for foldable tables eliminates the need for additional standalone furniture, saving overall costs.
Install Built-in Oven and Microwave

Making the most out of limited space calls for strategic appliance placement. By installing the oven and microwave directly into the cabinetry, valuable floor and countertop space is freed up. Meanwhile, these appliances are kept within reach easing meal preparations.
Key points:
- Custom cabinetry ensures snug fit for the oven and microwave.
- Vertical alignment allows easy reach to both appliances while saving space.
- Position them near the fridge for a proficient work triangle.
- Install above sufficient countertop space to safely place hot items.
Add Under-cabinet Lighting

Under-cabinet lighting creates a dual-purpose, practical and aesthetic solution for a small L-shaped kitchen. It illuminates the workspace, making cooking tasks easier and safer. It also helps create a warmer, more inviting ambiance.
1. Enhances task lighting: Perfect for food prep and cooking, reducing the risk of kitchen mishaps.
2. Highlights backsplash: Showcases your backsplash, adding extra dimension and style.
3. Deepens the ambiance: Provides low-level illumination that’s more subtle than overhead lighting.
4. Makes smaller spaces feel larger: Brightness can give the illusion of a bigger, more open space.
5. Increases functionality: Eliminates shadows created by wall cabinets, offering optimal visibility.
Use a Small Island With Stools for a Dining Area

In a small kitchen, capitalizing on space is key. Here, an island can play a pivotal role. But not just any island, a carefully chosen and strategically placed island with accompanying stools that can double as a dining area.
- The island should be proportional to the kitchen space to avoid cramping.
- Opt for stools that can be tucked under the island when not in use.
- Make sure the island has compartments under to store kitchen essentials.
- Place the island in a way that it doesn’t obstruct movement in the kitchen.
- Consider a drop-leaf island design for flexibility and further space-saving.
- Opt for lighter color materials for the island that complements the overall kitchen color scheme.
- Ensure adequate lighting over the island to enhance its functionality.
Combining smart design with practical function, this approach uses every square inch of the kitchen and makes the space look chic and inviting.
Use Hanging Pot Racks or Hooks

Hanging pot racks or hooks can prove to be a lifesaver in a small L-shaped kitchen. Carefully position them over the island or stove for easy access. This method frees up significant cabinet space, leaving more room for other kitchen essentials. Plus, they imitate a chic, professional kitchen style.
Consider these essential points:
- Choose sturdy, high-quality hooks to ensure reliable support.
- Opt for a stylish rack that matches your kitchen’s aesthetic.
- Regularly used pots and pans should be at a reachable height.
- Keep sharp objects or utensils away from high traffic areas to avoid accidents.
- Space out the hooks for each utensil to avoid clattering.
- Keep a small step stool nearby for reaching higher hooks.
Install Pegboards for Additional Storage

Pegboards, usually reserved for the garage or workshop, can be an innovative addition to an L-shaped kitchen. They provide flexibility in arranging utensils and cookware, making them easily accessible while cooking.
- Efficient Occupancy. Maximize and organize the vertical space on the walls.
- Customizable. The pegs are movable, allowing you to adjust the layout based on changes in utensil collection or usability.
- Visibility. Even with a small kitchen space, you can easily view and select the needed tools.
- Cost-Effective. Installing pegboards will not break the bank, yet they offer a high utility value.
Remember that setting it up requires careful planning. Consider location, size, and material to match your kitchen’s aesthetic and functional requirement. Don’t forget to ensure a secure installation to handle the weight of the kitchen tools.
Go for Clear Glass Cabinet Doors

Clear glass cabinet doors serve several essential functions in a small, L-shaped kitchen environment.
1. Visualization of Stored Items: By offering a view inside the cabinet, these doors make it easier to locate dishes, cups, and other kitchen accessories without the need to open and search through them.
2. Light Reflection: Similar to mirrors, clear glass can reflect both natural and artificial light, which in turn makes the kitchen appear larger and more spacious.
3. Design Appeal: Adding an aesthetic appeal to the kitchen, glass cabinet doors carry a timeless elegance that blends well with various design themes from contemporary to rustic.
4. Illusion of Space: Like windows, the transparency of glass cabinet doors tricks the eye into perceiving more depth, thus making the kitchen look deeper than it is.
5. Focus on Organized Storage: Where messy storage can be eyesores, clear glass doors keeps homeowners motivated to maintain tidiness inside the cabinets for an always-guest-ready kitchen.
Opt for Slimline Cabinets and Appliances
Adopting slimline cabinets and appliances can be a boon in maximizing your L-shaped kitchen’s convenience and efficiency. They are specially designed with a sleek, narrow style to occupy less floor space while still offering substantial storage and functionalities.
Key strategy points are:
- Choose refrigerator and dishwasher models with a slimline design, which retain full functionality in a more compact footprint.
- Opt for narrow, tall cabinets that extend up to the ceiling, exploiting the kitchen’s vertical space efficiently.
- Incorporate pull-out storage systems within these slimline cabinets. These systems can hold everything from pantry items to pots and pans, optimizing the use of space inside.
- Use low-profile handles or push-to-open mechanisms on cabinets and appliances, maintaining a streamlined aesthetic and preventing any obstruction in narrow spaces.
Continue exploring:


